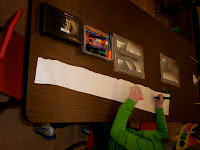
Is there anything better than snowman building for sequencing? I love it! Several weeks ago now we read lots of stories about snowmen, snow, and cold weather. We ended with a project I created last year and just adored. We built our own snowman out of butcher paper!
I know, I know....not that creative.
We started by brainstorming what we would need to build a snowman and I gave each of them a step to write on a sentence strip.
Ok. I know. Still not that creative.
But, here's the part I adored:
Can you see all of that paper in the middle of the circle of creepily faceless children? It's all different. All different sizes, different shapes, and widths. Why? Because we all had different needs. Some of us needed a really huge piece of paper, some of us needed a long skinny piece, while others just needed a tiny square. It might seem that it would be only fair that we all get the exact same paper, but that's just not what we all needed. The pictures I'm posting are actually from my last year's bunch of kiddos. They were a group with lot of different accommodations and several kids received various services. They were no strangers to the varying levels of fair, but this was a really concrete way for them to see it and understand it.
We worked together to decide who should use each piece of paper to match their sentence strip. Then they set out to work. When they finished their task, they were invited to find someone who's task was more time consuming and help them out. By the end of the project they were using incredible teamwork.
When all the pieces were complete, we assembled our snowman piece by piece in the hall.
I took their picture as they added their piece and printed it into a wordless book. (Helpful hint: when you make books using their pictures, use Powerpoint. Choose the template with a large picture and small spot for words - all of your pictures will turn out the same size!)
The following day, they received their page and the words to add to their page.
This project is also great because it is so easy to differentiate.
And that's it. A little language arts, a little social studies, a little fine motor, a little team building, a little lesson in life. All To Build A Snowman.


